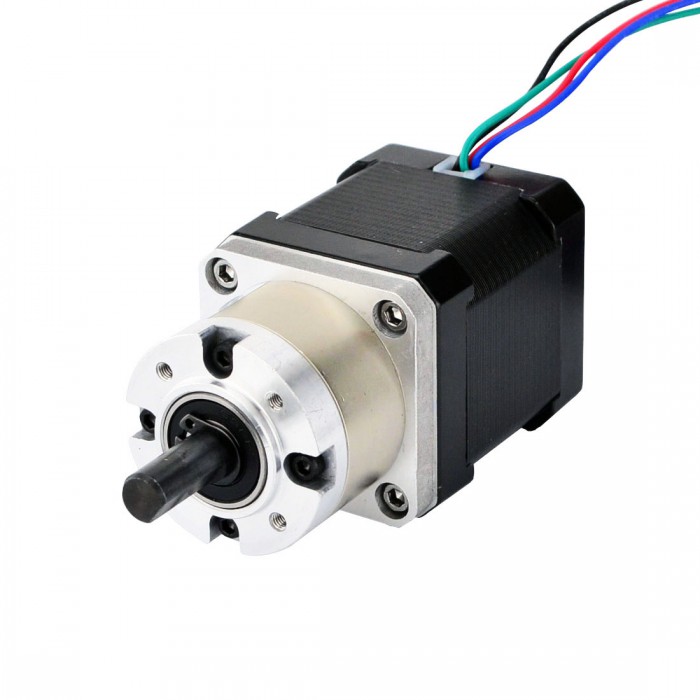
The choice of a stepper motor and power
supply voltage is entirely application dependent. Ideally the motor should
deliver sufficient at the highest speed the application requires and no more.
Any torque capability in excess of what the
application requires comes at the high cost of unnecessary motor heating.
Excess torque capability beyond a reasonable safety margin will never be used
but will exact the penalty of an oversized power supply, drive stress and motor
temperature.
Learn to distinguish the difference between
torque and power; high initial torque at low speed does not mean efficient
motor utilization. Usually, power is the more important measure of a motor’s
suitability to an application. To determine this, you must bias the motor’s
operating point through power transmission gearing to operate the motor at its
maximum power; normally just past its corner frequency.
The maximum shaft power sustainable with a
drive running at 80VDC and 7A is around 250W, or one third of a horsepower.
This is primarily achieved with double or triple stacked NEMA
34 motors.
NEMA 23 motors are physically too small to
dissipate the resultant hear and NEMA 42 motors are too big to be properly
impedance matched; if their current is less than a 7A drive’s limit then the
voltage will generally be above the maximum voltage of 80VDC and vice versa.
The detent torque on a NEMA 42 motor is
significantly higher than in smaller motors and is always a loss that must be
subtracted from the potential available power output of the motor. In other
words, the output power of a NEMA
42 stepper motor drops more rapidly with speed than smaller motors. A NEMA
42 motor should be used only if high torque is required at low speed and it is
not practical to gear down a smaller motor.
An efficient motor, defined as the smallest
motor sufficient to meet the demands of the application, will run hot. Think of
the motor as having fixed power conversion efficiency: Some percentage of the
input power will be converted to heat and the rest will be converted to
mechanical power. To get the maximum performance from the motor, the waste heat
must be just under what the motor can tolerate. Usually this motor will be
biased to operate just past the corner speed as well.
The place to start is to determine the load
torque in oz/in, including the torque necessary to accelerate the load. The
next step is to come up with the maximum speed the application has to operate
at in full steps per second using the formula below. RPI is the revolutions per
inch after the motor turns through the transmission, RPS is revolutions per
second and PPS is the number of pulses per second from your step pulse source.
(DESIRED IPM * RPI) / 60 = RPS
RPS * 200 = PPS
Multiply the PPS value by the number of
oz/in determined previously and divide the total by 4506. The answer will be
how many watts mechanical are required from the motor to meet the load from the
application. When picking a motor, choose one with 40% more than the calculated
power. Below is an example of the equation completed for a load requiring 450
oz/in with a 3 TPI leadscrew and a desired IPM of 300.
(300 * 3) / 60 = 15
15 * 200 = 3000
(3000 * 450) / 4506 = 299 OZ/IN
299 * 1.4 = 419 OZ/IN
As you can see, you will want to use a
motor with a rating of 419 oz/in for this application.
One of the most frequent questions among 3D printer owners is how can we quiet down our machines? While some embrace the beeps and boops, even using custom g-code to play their favorite theme songs, most of us would prefer not to hear it from across the house. There are plenty of ways to reduce the noise, but stepper motor dampers are the most effective and affordable option available.
The biggest concern however is what, if any effects will these have on the print quality? Since dampers use a rubber pad to absorb vibrations, it could theoretically introduce lag to the motion system.
Without before and after examples to compare, or an explanation of the process, most users rely on scraps of feedback from others. In effort to consolidate these details into a more comprehensive guide, we will look at the most important topics you should be aware of when using stepper motor dampers.
Stepper motor china dampers are essentially just shock absorbers, designed to reduce mechanical vibrations and resonance. They are made of two metal plates and separated by a rubber spacer, which allows the motors to flex while absorbing any feedback.
This is an effective way to eliminate motor noise, but could also increase print defects and cause the motors to overheat. Before we dive into the installation, we will first look at differences in sound and print quality, then explain how to cool the motors with aluminum heatsinks as well.
Since our goal is to quiet the 3D Printer, it’s important to have an idea of what effect the stepper motor dampers will have. In the video, we look at the Ender-3 printing without dampers, then X and Y dampers installed and finally the Extruder damper added as well.
The decibel level doesn’t change much at each stage, from 54 dB with no dampers to 52 dB with all three in use, but it still makes a substantial impact on the overall noise levels. Once we no longer hear the motor vibrations, it becomes apparent just how loud the stock fans are.
The benefits are obvious, but that brings us to the most important question… do these affect the print quality? The general consensus is no, dampers on the X and Y axis don’t cause any residual artifacts on prints.
As we mentioned before however, dampening the extruder is not advised. This can in fact affect the results and potentially cause under extrusion, ringing and in my case, excessive stringing. If complete sound reduction is your objective, a damper on the extruder may be a no-brainer, but I would start with the X and Y motors first and go from there.
Here are several prints taken at the same stages as the video, before the dampers were installed, dampers on the X and Y motors and a damper on the Extruder motor as well.
Since the extruder moves nonstop during prints, the X-axis motor is one of the largest contributors to 3D printer noise. The vibrations pass into the frame and amplify the sounds, which creates the loud mechanical squeals.
To get started, we first need to loosen the (2) tensioner bolts on the right side of the frame, just enough to give the belt some slack. On the left side of the frame, peel back the QR sticker on the cover plate to access the (4) bolts underneath it. These pass through a metal mounting bracket and lock the stepper motor in place.
Hold the motor from behind with your hand to keep it from falling, then unscrew and remove all (4) bolts from the cover plate. Doing this will expose the belt pulley, held in place with (2) small set screws on the side. You don’t need to take off the pulley at this stage, but we will adjust the alignment when reassembling it, so I opted to go ahead and remove it.
With the motor sitting face up, place one of the stepper motor dampers around the spindle as shown. Make sure the damper’s screw holes without threads are used to secure it, we will need the threaded holes in the next step. Since the motor will now be supported by only 2 screws, tighten these down and check that it is locked firmly in place.
If you removed the belt pulley in the previous steps, go ahead and put this back on the motor spindle. Keep the set screws loose and run the belt back over the pulley, then align it with the tensioner before tightening them down. Keep in mind, the motor spindle has a flat side and one of the set screws should be tightened against it.
To finish up the X-axis, position the cover plate against the bracket and thread (2) of the original screws into the assembly. These should pass through the cover plate, mounting bracket and the threaded holes on the damper. There are only two holes that the screws can thread into, but for aesthetic purposes, I just placed M3 nuts on the other 2 to reuse all of the screws.
We will repeat the same process for the Y-axis, where the steps are nearly identical. Start by unscrewing the (3) bolts on the Y belt tensioner which is located on the front of the Ender-3. The only difference compared to the X-axis is this tensioner has 3 screws, where we need to loosen all of them to give the belt slack.
Rotate the machine to access the rear stepper motor, where you will find an assembly identical to the X-axis. As mentioned before, you can leave the pulley on the motor if desired, but I took mine off for the sake of clarity in the photos.
Since the Y-axis motor has no cover plate, we can just go ahead and unscrew the (4) bolts holding it in place. Set the motor down with the spindle facing upwards, place one of the dampers around the spindle, and screw it into place using the holes without threads as we did before.
With the damper in place, go ahead and reinstall the motor on the Y-axis bracket. Keep the pulley’s set screws loose and run the belt back over it, then align it with the tensioner at the front of the machine.
While it’s not recommended to use stepper motor dampers on the Extruder, many owners do so for further noise reduction. It does help to silence the retraction movements, but may also have a negative impact on the overall print results. Since the steps are somewhat different from the X and Y axis, we will take a look at the process for anyone interested in doing so.
To get started, we first need to remove the extruder lever, held in place with a single screw as pictured below. If needed, you can compress the spring while loosening the screw to reduce the tension. Take off the lever and spring and sit them aside, then remove the remaining 3 screws in each corner, where these hold the stepper motor in place.
Once the motor is detached, set it down with the spindle facing upwards and and install the damper as pictured. As we’ve done in the previous stages, make sure to use the non-threaded holes for the motor screws. The threaded holes will be used to mount the motor to the extruder plate. stepper motor you may be interested:(cnc stepper motor kit or 4 axis cnc kit)
Hold the motor in place under the extruder plate and insert one screw, then tighten it down to lock the motor in position. Since we need one of the damper’s threaded holes for the lever screw (back right), I would suggest rotating the motor or damper as needed.
With the motor installed, loosen the set screws on the brass feeder gear and slide it near the top of the spindle. This doesn’t have to be perfect, but it should be raised enough to feed the filament without slips. In my case, the top of the gear was flush with the motor spindle, which should be the case for anyone with an Ender-3.
Go ahead and place the extruder lever in position and tighten it down with the original screw. This should thread into the rear damper hole, but make sure that the lever is still able to move. You may need to back it out 1-2 turns if so, where it must be able to compress the spring.
Finally, insert the tensioner spring in between the extruder plate and lever, where there is a notch on each side that fits inside of the coils. I compressed the spring with adjustable pliers, although you can loosen the lever and fit it by hand as well.
While the stepper motor dampers do reduce vibration, they also reduce the heat transfer as well. As a result, the motors can get extremely hot when printing and this will inevitably shorten their lifespan. To improve the heat dissipation and keep the motors cool, we can install 40mm aluminum heatsinks with thermal tape.
Since I used 10mm thermal tape, I had to cut several strips for each heatsink. Leave these strips a bit longer than the surface area and lay them as close as possible to ensure full coverage. Once finished, you can just flip the heatsink over and cut the excess length off with scissors. As these are double sided, just peel back the corners of the protective sheet to expose the adhesive.
Once you are ready to install the heatsink, go ahead and peel off the rest of the protective sheet. Align two of the edges with the corner of the motor and then press the heatsink into place, holding it firmly for about 30 seconds or until it bonds to the surface.
For the X-axis motor, it worked fine placing it on the bottom of the motor but as shown in the picture below, doing so on the Y-Axis actually hampered the bed movement. The leveling wheels are too large and will heat the heatsink, where it needs to be stuck on one of the sides that is out of the way.
Not everything can be an advantage, stepper motors also have quite a few important disadvantages, lets go through them.
Very low efficiency Yes, the stepper motors waste a lot of energy, compared to the traditional electric motors. Therefore, they consume more current than common motors. They also consume their maximum when in rest, so they tend to reach high temperatures.
To turn a full revolution, the motor has to step 200 steps, one step at a time. Therefore a common electric motor will always go faster. If you need speed, you have to invest in a servo motor (which are more expensive), or get your hands on a stepper motor with an encoder.
What is an encoder? An encoder is a device which allows you to know the real current position of a motor. Low torque at high speeds If on rest they are very strong, just the opposite happens at high speeds. They suffer the same problem as I do when I go for a run, I run out of steam really fast.
Feedback They don’t provide feedback. Unlike servo motors, the stepper motors do not know their position at any given time, and they cannot adjust themselves. Your only option is to build a system by yourself to measure and correct their position.